Enable Unity Catalog and Delta Sharing for your Databricks workspace
With Databricks becoming more popular day-by-day as a solution for data engineering & data science, the onus was on Databricks to provide unified and integrated solution within their platform to support further on Data Governance; i.e. keeping a governed overview of all data assets, data access management, data quality & the lineage driven by old saying “with great power comes great responsibility “.
Similarly organizations expected Databricks to provide mechanism around sharing live data with diverse set of clients in a scalable manner with high reliability and efficiency.
Sooner Databricks responded by accommodating two features viz. Unity Catalog and Delta Sharing to above requirements.
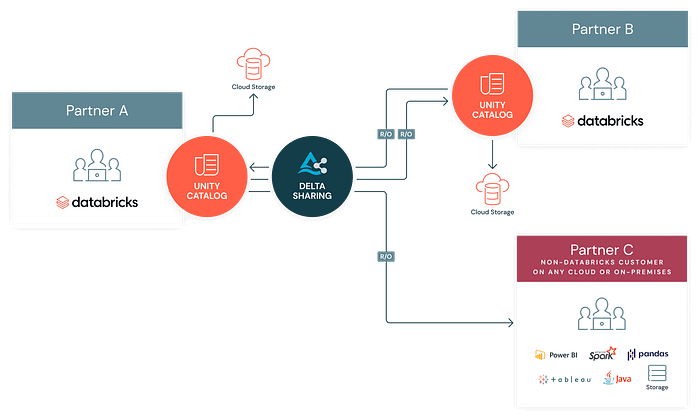
In this article I’ll touch upon these two new features in Databricks — in terms of what value they bring to the table and most importantly how we configure them in our workspace.
1. What is Unity Catalog?
Unity catalogue is Databricks solution to support Data Governance: it enables data governance and security management using ANSI SQL or the Web UI interface and offers a tool that allows to:
· Centralized metadata, User Management and Data Access controls
· Data Lineage, Data Access Auditing, Data Search and Discovery
· Secure data sharing with Delta Sharing
And like — over time — much more. However in this blog, we would mostly cover data sharing aspect and setting up of Unity Catalog as pre-requisites using Azure platform.
1.1 How to setup Unity Catalog?
1.1.1 Prerequisites
Refer Requirements section from Azure documentation.
Please note that the Databricks Account Admin role is different from Databricks Workspace Admin. If you are Azure Global Admin (this is Azure AD level role and simple Azure roles to manipulate Azure resources) then automatically you become Databricks Account Admin or else you have to seek support from current Databricks Account Admin to make you Databricks Account Admin.
1.1.2 Detailed Steps
Step #1 Create Storage account and containers
Create ADLS Gen2 storage account and container underneath it for further use. You may refer here for detailed steps if you need help.

Step #2 Configure a managed identity for Unity Catalog
Create Access connector for Azure Databricks and assign Managed Identity (add Access connector as member) access to the storage account you created in above step. Refer this for detailed steps.
Note the resource Id (sample format /subscriptions/<subscription-id>/resourceGroups/<resource_group>/providers/Microsoft.Databricks/accessConnectors/<connector-name>) which would be needed in future steps as Access Connector Id
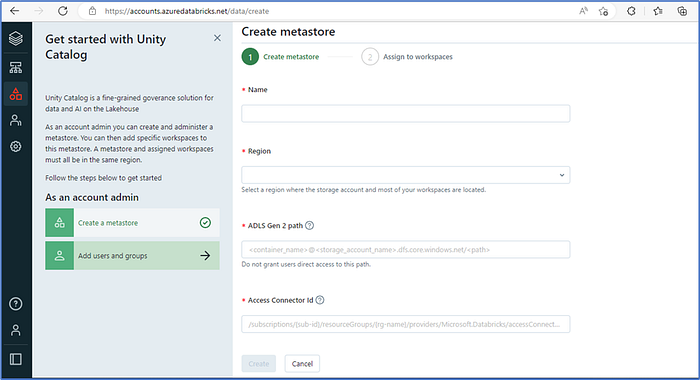
Step #3 Create Unity Catalog Metastore as following
· Log into Azure Databricks account admin portal using https://accounts.azuredatabricks.net/ (for AWS Databricks account admin portal use https://accounts.cloud.databricks.com/)
· Click Data and then on Create Metastore to fill out following. Make sure you enable/attach your workspace to Unity Catalog in net tab
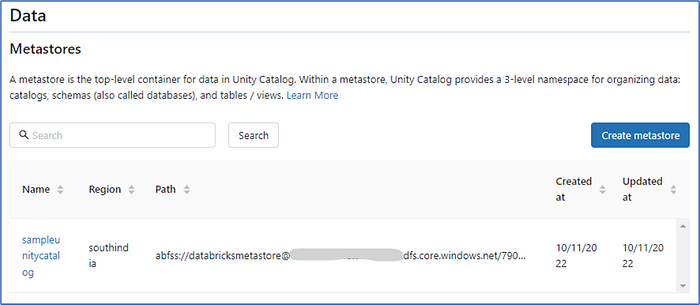
Once metastore is successfully created, you can see the same as below:
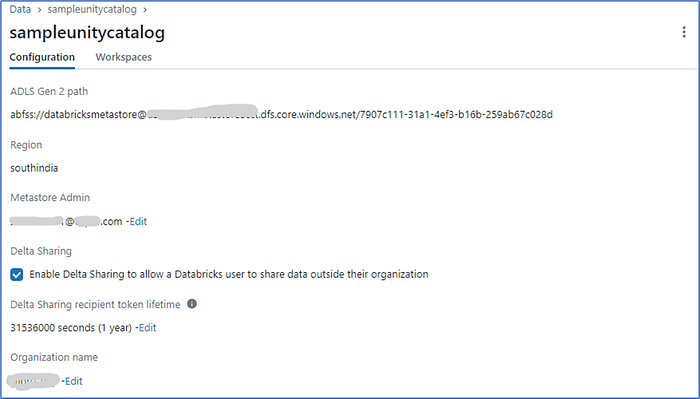

Step #4 Make use of Unity Catalog — create schema and tables
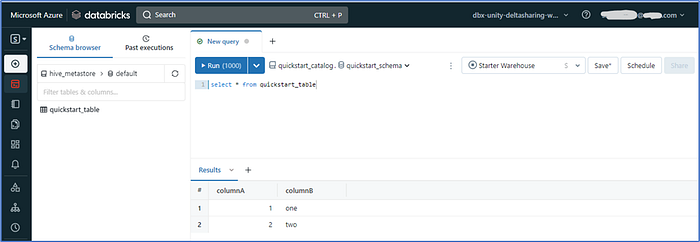
Launch the Unity catalog enabled workspace and for sample import quick start notebook from https://docs.databricks.com/_static/notebooks/unity-catalog-example-notebook.html to create delta tables using three level namespace i.e. <catalog>.<schema>.<table>
Once the notebook is executed, you can view the data in Notebook or SQL Editor.
Now that Unity Catalog is set up, let’s understand what is Delta Sharing and how that can be enabled.
2. What is Delta Sharing?
Databricks Delta Sharing is an open solution to securely share live data across different computing platforms.
It’s built into Unity Catalog data governance platform, enabling a Databricks user, called a data provider, to share data with a person or group inside or outside of their organization, called a data recipient.
Delta Sharing’s native integration with Unity Catalog allows you to manage, govern, audit, and track usage of the shared data on one platform. In fact, your data must be registered in Unity Catalog to be available for secure sharing.
The various use cases Delta Sharing can solve are following:
Commercialization — Simplify data as service with easy to implement trusted data sharing and no lock in.
B2B Sharing and Reporting — Partners/counter parties can consume data using tools and platforms of their choice
Internal Sharing Data Mesh — Share data across divisions in different clouds or regions without moving data.
Privacy Safe Data Cleanrooms — Secure way to share and join data across partners while enabling compliance with data privacy.

2.1 How to enable Delta Sharing?
Delta sharing can be achieved in either of the two modes i.e. Open sharing or Databricks to Databricks sharing
Open sharing lets you share data with any user, whether or not they have access to Databricks.
Databricks-to-Databricks sharing lets you share data with Databricks users who have access to a Unity Catalog metastore that is different from yours.
In this article, we will see how to setup both the options — first the Open Sharing followed by Databricks to Databricks Sharing option.
2.1.1 Pre-requisites
Refer Requirements section from Azure documentation.
2.1.1.1 Scenario 1: Open Sharing — Detailed Steps
Step #1 Enable Delta Sharing and set expiration timeline
Enable Delta Sharing on Metastore window with some expiration timeline. Without any timeline set, it’s defaulted to indefinite time-period. Refer Fig-4 above.
Step #2 Enable Audit for Delta Sharing
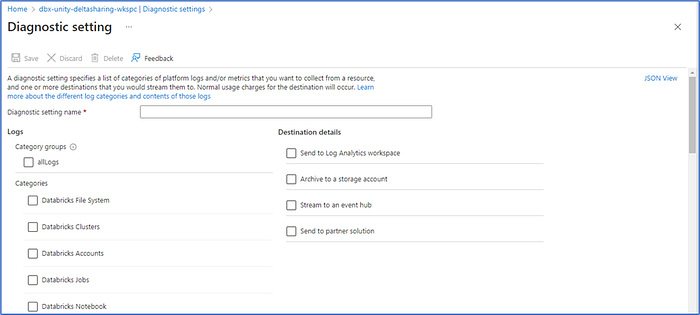
Configure audit for Delta sharing activities like create, modify, update or delete a share or a recipient, when a recipient access the data or when recipient accesses an activation link and downloads the credential etc.
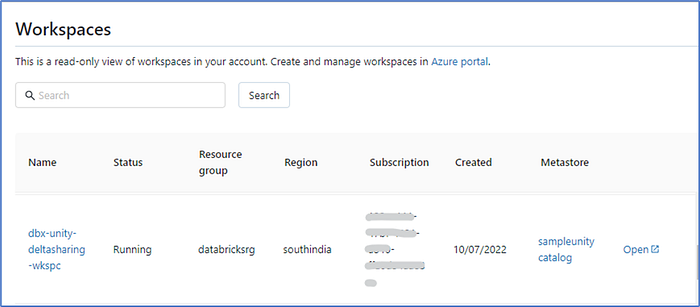
Launch the workspace from Databricks Account Admin portal and go to Admin Console →Workspace settings to turn on Verbose Audit Logs


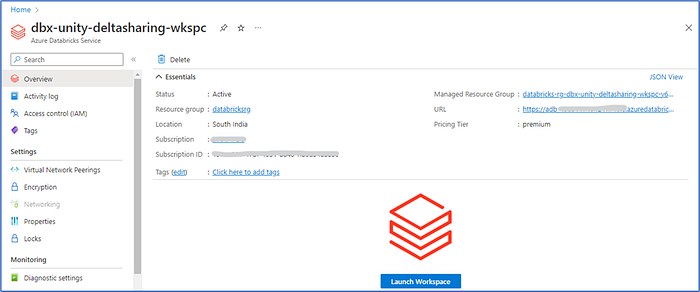
Then go to Databricks service from Azure portal and click on Diagnostic Settings and select the logs/events and destination where you want them to redirect to.
Note — I’m not going into details how the events can be analysed from this point onwards using Log Analytics or other tools.
Step #3 Create share on the provider end
Once audit is enabled, go to your Databricks workspace and click Data and navigate to Delta Sharing menu and select Shared by me
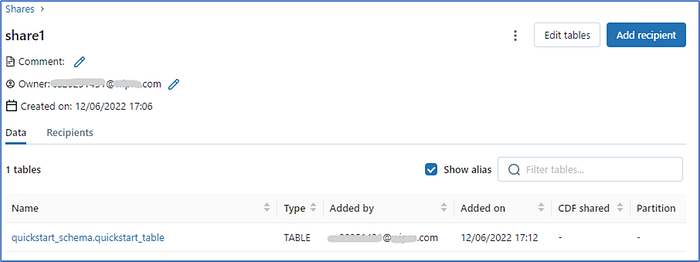
Create Shares (Navigate Share Data →Name)

And then add tables under it which you want to share by navigating to Add/Edit tables page — select the catalog and database that contain the table, then select the table(s).

Step #4 Create recipient on the provider end
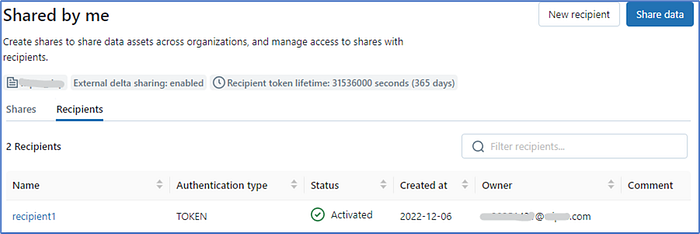
Create Recipient (Navigate Add New Recipien →Name) and then link the same with Add Recipient option.
Please note that you do not use the sharing identifier for open sharing recipient.

Once a recipient is created you will receive a pop-up as below
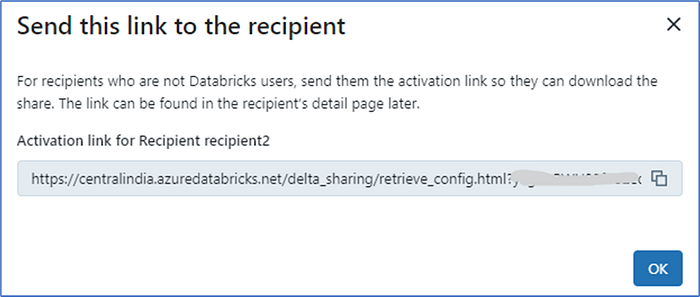
Copy the URL and paste it in browser to download the credential file
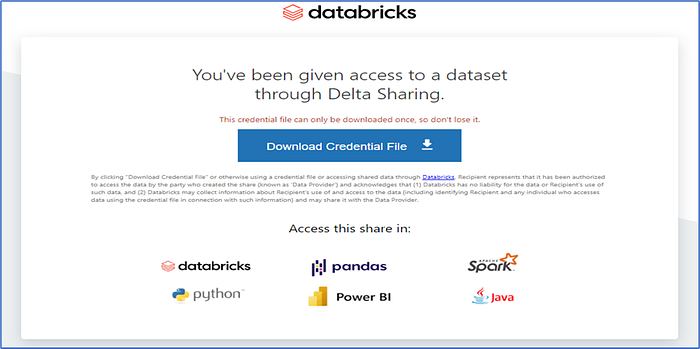
Please note that this Download option would be available only once.
Once the file is downloaded the token is activated. On recipient details page, you can expire the token immediately or after a time duration.
Step #7 Construct the Delta sharing (“open”) recipient/client
Once Delta share setup is complete, it’s now time to write client. Here I would show a simple Python (Pandas) client to access the share(data).
Once the credential file (config.share) is downloaded — use the same and use Pandas API to retrieve the data as shown below but please note that before you write your client you need to download the delta-sharing library.

2.1.1.2 Scenario 2: Databricks to Databricks Sharing — Detailed Steps
If you want to share data with users who don’t have access to your Unity Catalog metastore, you can use Databricks-to-Databricks Delta Sharing, as long as the recipients have access to a Databricks workspace that is enabled for Unity Catalog.
The advantage of this scenario is that the share recipient doesn’t need a token to access the share, and the provider doesn’t need to manage recipient tokens. The security of the sharing connection — including all identity verification, authentication, and auditing — is managed entirely through Delta Sharing and the Databricks platform
In this article, we would demonstrate how delta sharing can be made between two Databricks accounts — provider (hosted on Azure) and recipient (hosted on AWS).
Step #1 Request the recipient sharing identifier
On your recipient Databricks workspace, click Data and then navigate to Delta SharingàShared with me and then from Providers tab, click the Sharing identifier copy icon

Please note that recipient workspace must also be Unity Catalog/Metastore enabled (you can follow the steps as done in first workspace)
Step #2 Create recipient on provider workspace
This is same as previous Scenario 1 Step #3 above except the fact that for Databricks to Databricks sharing you have to provide the recipient sharing identifier that you copied from previous step.
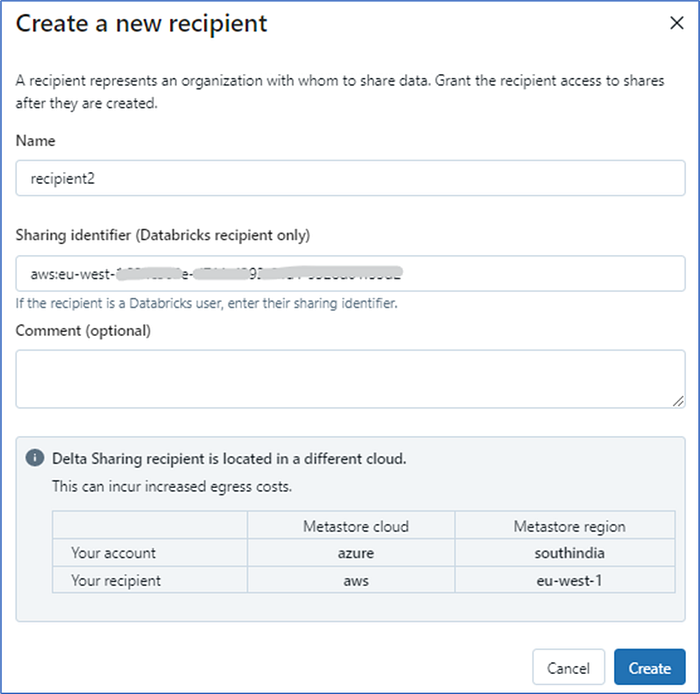
Since our provider account is on Azure and recipient one in AWS, that immediately gets reflected in this screen as soon as sharing identifier is accommodated.
Once you create the recipient, immediately that gets listed under recipient list with Authentication Type as Databricks (for Open Sharing same was Token) and you can view recipient details once you click on any particular recipient.
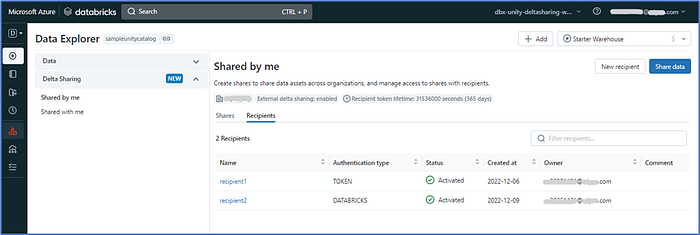
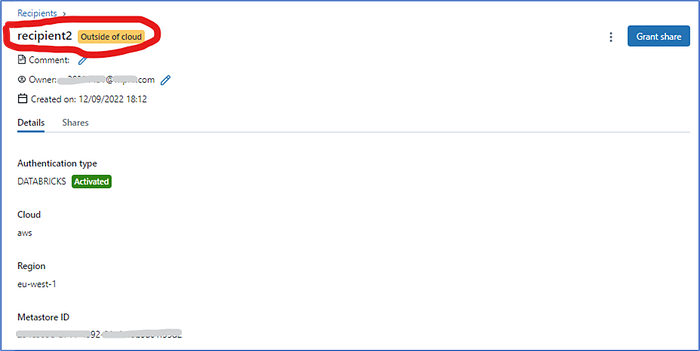
Step #3 Create Share on Provider workspace
Once Databricks recipient is added, it’s time to create Share and for that follow same steps as shown in Step #3 under Scenario 1.


Step #4 Create catalog from the share created on recipient side
Finally to access the tables in a share, a metastore admin or privileged user must create a catalog from the share on the recipient Databricks workspace.
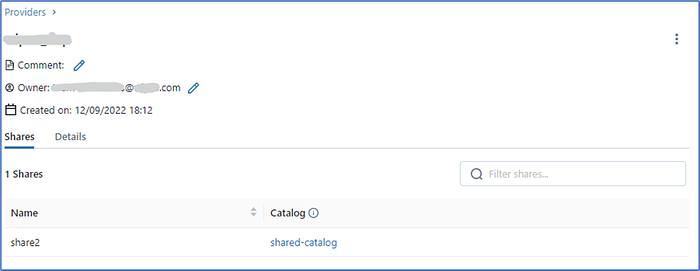
To do that go Delta Sharing menu and follow the navigation Shared with me →Providers→Shares (select particular share on top of which you want to create the new catalog)→Create catalog
Then enter a name for the catalog and optional comment to finish creating the catalog.

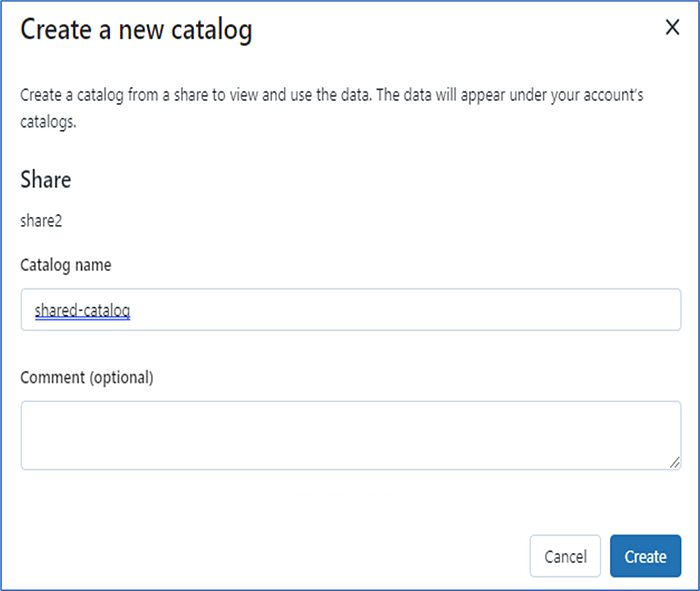
Step #5 Access data using the catalog created on recipient workspace
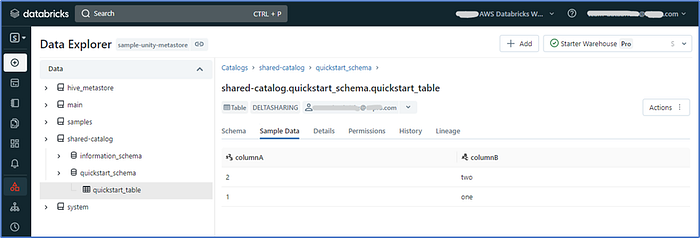
Once catalog is created on the recipient Databricks workspace, you can view the table (data) from Data tab as well as from Notebook if you query using <catalog>.<schema>.<table> qualifier

Thanks for reading. In case you want to share your case studies or want to connect, please ping me via LinkedIn
